Entries Tagged as 'DIY'

Before & After: Table & Chairs Makeover

103

28.10.13

4girlsNYC

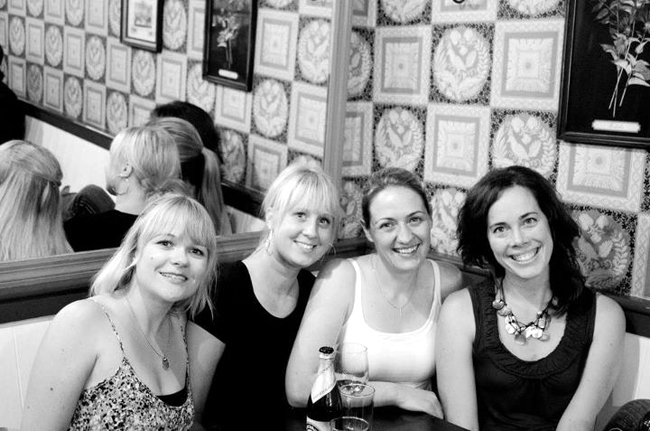
We’ve got a visitor on the blog today! Say hello to Sam everyone! This is us at Chelsea Market on a trip to New York. Sam is second from the left, in between Sherri and Claire. It feels like so long ago, and looking at this pic makes me want to jump on a plane! But, now that you’ve met Sam, you really need to take a peek into her amazing dining room transformation!

Table Before & After

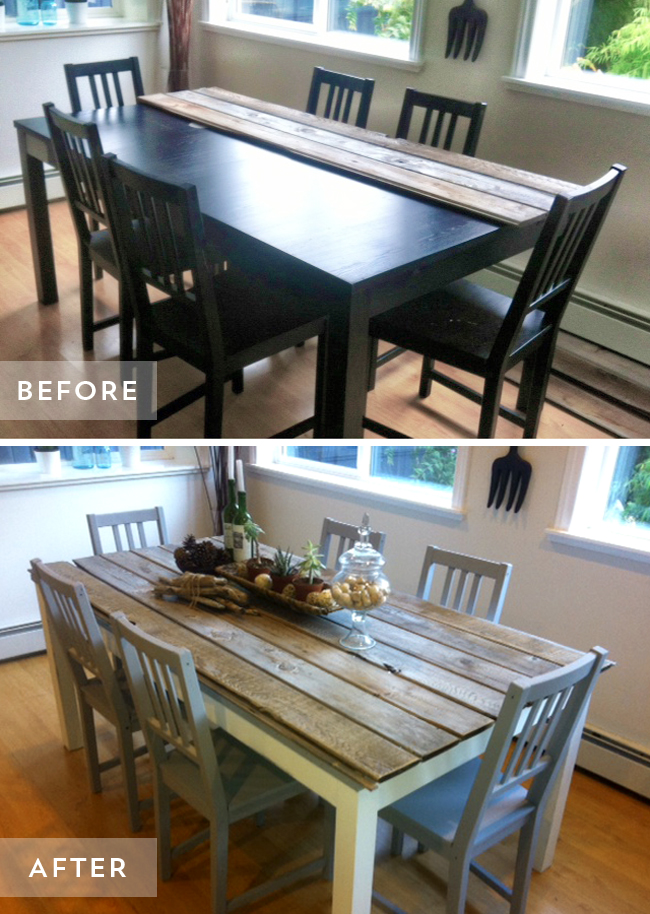
Isn’t it great! Sam wanted to change up her table and chairs, and with just a little paint that she already had on hand, and some interlocking boards, she has completely transformed the room for only $10! Pretty amazing DIY, don’t you think?

Thanks for sharing Sam!

[ UPDATE: I’ve received lots of emails with questions since this post, so I thought I’d answer them here so you don’t need to go searching through the comments if you have a question. Firstly, Sam used a couple cans of leftover FAT Paint chalk paint, mixed together, to come up with her table color. Because she was using this type of paint she didn’t sand or prime, just painted it on! She bought all of the boards in one bundle from Rona (Canada’s home improvement store) for $6! She nailed on the wood top. Hope that helps! ]

Pinecone Ornament DIY

28

04.12.12

Last year my oldest came home from school with a pinecone ornament for our Christmas tree. I loved the look of the white painted tips, and wanted to add a lot more of them onto the tree this year! So, I collected some over the last year, and tonight we spent some time painting the tips of pinecones!

This is truly the easiest DIY ever! All you need is:

  1. Paint, watered down until it’s thinner so that it doesn’t get clumped in the tiny spaces.
  2. Paintbrush
  3. Pinecones, the sturdier the better!
  4. Ribbon. I think a thin shimmery ribbon is nice, but some twine, or even string would look good.

Do you add pinecones into the decorating mix at your house in the fall and winter seasons? Have you painted them before? Next I’d like to try dipping some pinecones to look like these ones (above) by Jessica Christman. Aren’t they pretty?!

Milk Art: Take Two

6

20.8.12

Inquiring minds want to know! My Milk Art post brought many questions about whether or not I’d attempted to transfer the effect onto paper. I hadn’t, but since I would happily repeat this one, I thought I’d give it a shot.

Well, here is your answer… it does NOT work. Not well at least. All the detail and vibrancy is lost as soon as the paper touches down, and that really is the best part. If you are looking to make this into long lasting art I would suggest that taking a picture is your best bet.

Boredom Busters: Banana Tattoos

21

04.7.12

INSTRUCTIONS:

  1. Trace the banana shape onto paper.
  2. Draw something within that shape.
  3. Cut out the shape and tape it onto the banana.
  4. Use a pin, or thumb tack, to poke the skin of the banana.
  5. Wait. The image will slowly appear, kind of like a Polaroid image.

With the constant rain here on the west coast, I’ve been searching for ideas to keep the kids occupied indoors. This one was great because it kept their attention for at least a half hour, and they would happily do it again with different images!

Thanks to Cindy for the inspiration! I instantly thought, “The kids would LOVE this!” I hope you know someone that might like it too!

And for those of you that want to take it to the next level, check out this video to see some pretty amazing banana tattoos!

A New Fence!

12

20.6.12

This is our fourth summer in this house and I finally feel like we’re making some real headway! I just had to share this progress pic!

Last year Jason (aka husband extraordinaire) took down that big sun-blocking tree, and now everything is flourishing because there is sunshine in our backyard again! So far this year we’ve finished extending the patio and now have a new fence! A huge difference, don’t you think?!

Jason is finishing up building the garden box in that top corner so we can plant veggies this year, and we’re working our way SLOWLY out of that corner to tackle the rest of our landscaping plans. It’s amazing how a simple thing like a fence can make me fall in love with our yard!

Are you tackling any landscaping projects this year? Is your list of things to replace as long as ours?!

Spring Break DIY: Milk Art

156

17.3.12

Science & Art swirled up into one! This is my favorite project yet, and the last in the series! A huge thank you to Shannon (A Mom’s Year) for suggesting this art project. I was eager to try it, and I’m excited to share it with you!

All you need for this project is the following:

1. A plate  2. Milk (2% or higher)  3. Food Coloring  4. Dish Soap (That’s it!!)

1. Fill the plate with a thin layer of milk. Next, put in drops of food coloring.

2. Then, add a few drops of dish soap into the center of the food coloring, sit back, and watch! (I should mention that I tried this first with eco-friendly dish soap and it didn’t really work, so stick to the hard stuff for this!)

KA-POW! The milk fat instantly reacts to the soap, creating art!

Wow, right?! It will spin for quite a while, and if you add more drops of dish soap into the dark areas of food coloring you can keep the action going for quite a while.

If you want to see milk art in action, you can check out this video that I found:

Looking for more DIY’s to do with kids? Here are some more good ones:

Banana Tattoos / Eyebombing / Make a Volcano / Wire Sculpting

Photo Credits: Rosa Pearson (FlutterFlutter), Video Credit: Evie S

Spring Break DIY: Wire Sculpting

9

15.3.12

At a doctor’s appointment recently, my oldest was entertaining himself with a paperclip, bending it into shapes to pass the time. When we got home I found these images online, and was able to show him examples of amazing things that can be made with wire, skill and some creativity.

Just to give you an idea of age appropriateness, my seven year old was able to make this bone by himself, but my five year old would have needed help if he had been home. Supplies for this DIY project are easy, you just need some thin wire and a pair of pliers! I tried to make a chair and found out that constructing anything three dimensional was harder than I’d imagined. That’s where skill would come in handy! Regardless, it was so much fun to play with a new medium! I’ll definitely try this again!

Here are some of the inspiring pics that got us started – aren’t they amazing!

Artist: Masao Seki Photos copyright FIVE FROM THE GROUND

Spring Break DIY: Make A Volcano

18

13.3.12

I like projects that are simple and easy to prepare. In my opinion, the set up should not take all day if the enjoyment only lasts ten minutes. This is the easiest volcano you can make, believe me! And kids of all ages like to see things explode! All you need are the following:

WHAT YOU WILL NEED:

1. A tray, or dish, that is large enough to catch all the “lava” that will come out!  2. 1 tablespoon baking soda  3. Red food coloring  4. A can, or plastic cup  5. Paper bag  6. Vinegar

DIRECTIONS:

1. Cut halfway up all four sides of the paper bag.
2. Put the paper bag upside down over top of the can or cup.
3. Tear a hole in the top of the bag, above the opening to the cup.
4. Push back the torn edges and tape to the inside of the opening.
5. Fill the cup 3/4 full of the vinegar.
6. Add in a couple drops of food coloring.
7. Have the kids decorate the tray for full effect.
8. Finally, add in the baking soda and watch it go! You can add more baking soda and vinegar to keep the “lava”, and the fun, flowing.

As you can tell from the smiles this activity was a hit! (My oldest is fishing out the Lego Ninjago skeletons that he’d thrown into the volcano as it was exploding… yes, boys will be boys!) I’d definitely do it again!

I hope the Spring Break DIY’s this week help to make any rainy days a lot more fun! I know I’m having fun making them. And there are more to come…!

Spring Break DIY: Eyebombing

32

12.3.12

I would rather jab my eye with a fork than play Pokemon cards again. Really. Can anyone else relate? Thanks to some quality phone time with a good friend, I know I’m not alone in this. I just needed to change my attitude and step it up a notch… for everyone’s sake! If you’re in the same boat, and are looking for activities that you can do with your kids over Spring Break, or on rainy weekends, I’ve put together some sanity-saving DIY’s this week!

Have you heard of yarn-bombing before? I posted an example of it here… but I’m not a knitter, so I won’t be doing that. When I discovered eyebombing last week, I thought “HOW FUN! The boys would love this!” And I was right! My oldest and I spent a half hour placing eyes strategically throughout the house to surprise his younger sibling. It was really fun for us eye-bombers to watch all the faces being discovered with glee. And, now the younger one is excited to surprise his brother the next time he’s out.

This one’s good for the kid at heart too, don’t you think! I would love to hear what YOUR favorite activities are to do with kids! Oh, and stay tuned for more, because I’m only just getting started!

Photo Credit: Rosa Pearson (FlutterFlutter)

Pillow Cover Stuffed Animal

10

08.12.11

This pillow (and it’s mate) have been subjected to years of mistreatment by the boys. All the polyester stuffing was lumpy beyond repair. I kept them around because the boys played with them all the time. But, now that the family room has some new pillows, it was time for them to leave home.

Rather than throw them in the garbage, I thought that I would answer the pleas of a sick boy and make him a stuffed animal… out of one of the pillows! I cut the cover into body parts, sewed them together, and used the old polyester filling to stuff him. TA DA! Recycling at its best!

(Disclaimer: This picture is of the younger brother who was happy to steal away the new stuffed animal from his older brother.)

Photo Credits & Quote Design: Rosa Pearson @ FlutterFlutter

Theme by Blogmilk   Coded by Brandi Bernoskie