This is What You Will Need:
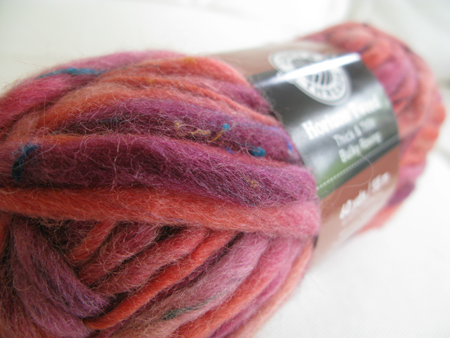
- Thick Wool Yarn (aprox. 1/2 ball for small, 1+ for large)
- Scissors or X-acto knife
- Poster board or Thick card stock
- Stapler
- Double sided tape
- Popsicle sticks or Chopsticks
STEP ONE: The Backer
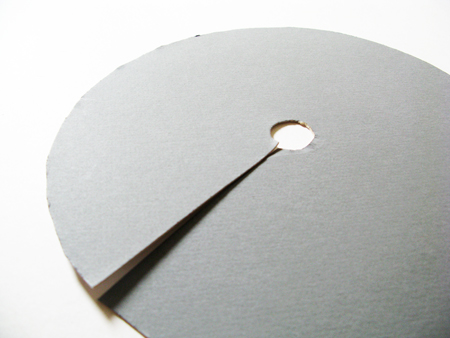
Trace and cut a circle out of poster board. Then cut out a 1/2″ – 1″ hole in the center of that circle, depending on whether you’re doing a large or small hat. Next, cut from the outside edge of the circle to the inner circle, as shown. I used a dinner plate as a template for tracing my circle. (10.75″ diameter (1″ center hole)).
STEP TWO: The First Layer
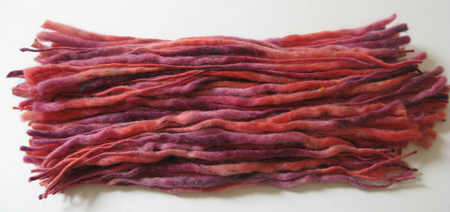
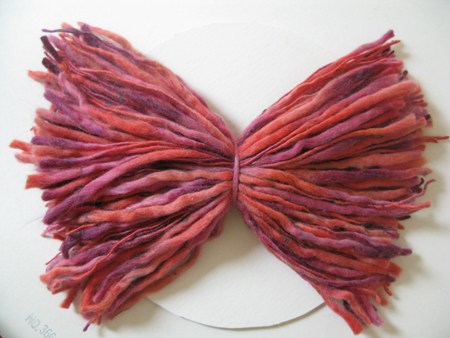
Cut the yarn aprox. 1″ longer than the diameter of your circle backer.
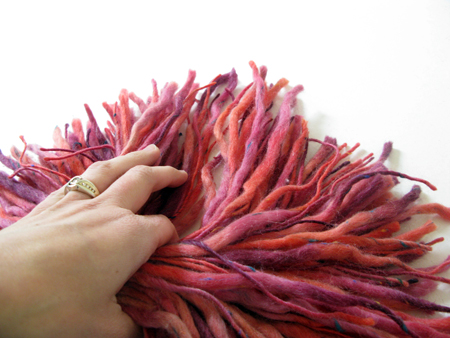
To figure out how much yarn you need to cut for the first layer, just hold it on top of the circle, spread it out like a fan, and see if there are any hollow areas. If so, cut some more until you like the fullness.
Once you’ve established that you have enough yarn to fill your circle, use a piece of yarn to tie the bundle in the middle.
STEP THREE: Additional Layers
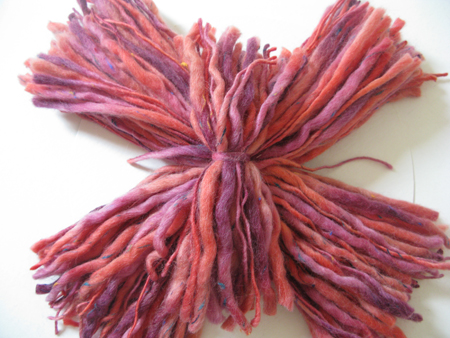
Divide the sides of the first bundle in half so that it’s the shape of an x. Cut a second bundle of yarn into shorter lengths than the first (mine were 4″ shorter) and tie. Place bundle vertically onto the x and tie around the sides of the x shape. Repeat with a third, even shorter layer, if desired. I did. Just make sure that you tie on the third layer horizontally this time. You don’t want all the ties in the same place or it will naturally want to separate in that area.
STEP FOUR: Attach to the Back
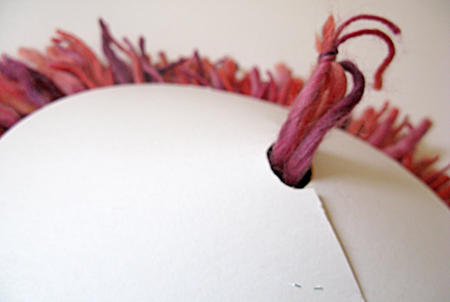
Turn yarn upside down so that the knots are facing up. Overlap the edges of the poster board to desired cone shape. Staple in place. Pull the ends of the ties through the hole, and tie a knot with the ends to create a loop for hanging.
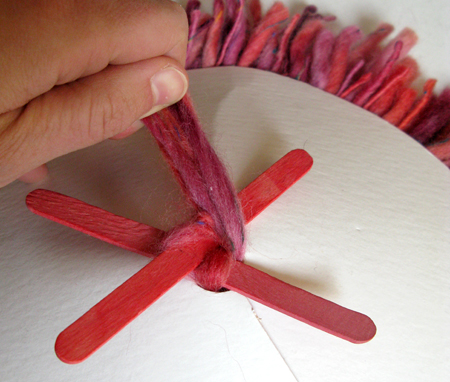
If your hole ends up being a bit too big, and the knots themselves don’t hold the yarn in place, then tug on the yarn ends and stick some popsicle sticks through under the main knot to secure in place. They will also help stabilize the Wool JuJu Hat so that it sits flatter when hanging on the wall.
STEP FIVE: Secure the Yarn
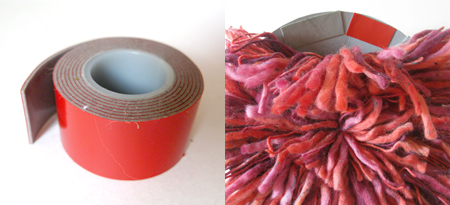
Stick the double sided tape onto the back, peel off red layer, and press the yarn down into the desired position.
THE END!
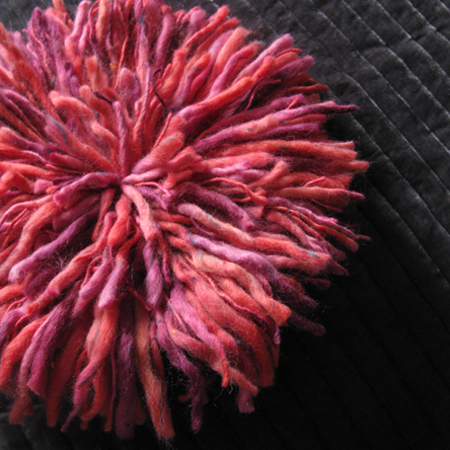
My favorite part of this project is that JuJu Hats cost hundreds of dollars, but this one doesn’t!! Or, you can buy one of my Faux Juju Hats on my Etsy shop!
Please let me know if you give it a try! And link up if you post your results! Thanks!
Photo Credits: Rosa Pearson Design for Flutter Flutter



65 comments :
Rosa, you made that look so easy! I just may try making a JuJu Hat. (It’s so fun to say too isn’t it!)
Holy Smokes. How did you think of that? Love it!
Barbara, I really wanted one, but didn’t want to spend the money… and that is how the DIY was born! : )
Nice pics lady! Are those done with your new camera???
Thanks Tracey! No, the pics are using my good old point and shoot! No new camera yet…
Very well done (the hat and the tutorial)! Need to add this project to my list…
LOVE Juju hats! And I’m with you Rosa – would so love to have one, but $600 is a big GULP 😐 Thank you so much for sharing this great tutorial!
You’re welcome Sheila! Thanks for visiting! Great to meet new bloggers!!
Color me impressed, girlfriend, that turned out amazing! That is so cool how it translated and all the color and texture is so rad (c: I have definitely been noticing these juju hats popping up an awful lot in the design world and this is a BRILLIANT (and cost effective) solution…LOVE IT!
You are brilliant!! I am adding this to my long list of projects:) Thanks for the great tutorial!
That is amazing! I will definitely be doing this!
xo
Karina
AMAZING…Thanks!!!!
Perfect! Another project on my to-do list. 🙂
Wow, great step by step, and the final product is incredible! Thanks for stopping by my blog and thereby leading me to yours! am loving it.
Rosa, this turned out amazing!!! Love it 😉 Fantastic post.
amy*
Ps. Thank you so very much for your thoughtful comment on my blog yesterday. It meant a lot to me!
This is absolutely beautiful. I have wanted a JuJu hat for ages but they’re way out of my price range – this is the perfect solution. I might even post it to my blog – if you don’t mind?
Thanks for stopping by and saying hi Pascale!
Chair and Pillow Fabric for the Master | flutterflutter.ca June 2, 2011 5:58PM
[…] all the grey. It was the jumping off point for our master bedroom. I’m adding some of my Faux Juju Hats in a variety of colors and sizes on the wall above the chair to add some more colour and texture to […]
I absolutely love this. I looked at the juju hats and once I saw the price I stopped. But after reading your tutorial, I might just make one. Thanks for a great tutorial.
Rosa, beautiful work, fantastic photos. Mind if I shout it out on my blog?
Thanks for the sweet words! I’d love it if you did a shout out! Thanks for asking Sari.
I love this. I just finished mine and it took just a few minutes! This is brilliant, especially for us design divas on a budget!
That’s great Roni! I’m so glad it worked out for you!!
I had just found a spot for 3 Juju hats that I have been drooling over for months. Then I realized how much it was going to cost me! Yikes, I am thinking your wonderful tutorial is the better option. Thanks for sharing it with everyone.
JuJu Hat Tutorial By: Rosa Pearson · Felting | CraftGossip.com June 21, 2011 4:26PM
[…] was so impressed when I found this amazing wall decoration Tutorial By: Rosa Pearson and searched the Internet for the “Cameroon feather headdress” and you can see some […]
this is awesome! Thank you so much for sharing. I might have to try this
Kim
Αφρικάνικα καπέλα στους τοίχους… | The Decopages July 4, 2011 7:26AM
[…] αρκετά ακριβά, γιαυτό και χάρηκα πολύ όταν βρήκα στο blog της Rosa τον τρόπο να κατασκευάσουμε εύκολα και κυρίως […]
Hi Rosa,
I tried making it and mine doesn’t look half that good. I am off to giving it another shot with another type of yarn. Will let you know how it turns out. Have a good one!
i love this tutorial! so fun and inventive! might just need to give it a whirl 🙂
Feather Juju Hats July 29, 2011 10:48AM
[…] at Flutter Flutter created a $10 version that uses yarn and looks really good especially for a tiny fraction of the price of an authentic hat. You can […]
I must make one. Thank you for the tutorial.
Brilliant!
Brilliant!
Brilliant!
Thank you for sharing, this looks like something I could definitely have a go at doing.
xx Felicity
Wow, thanks Felicity!! I hope yours turns out fabulous!
Love this JuJu hat tutorial. We just moved to Vancouver BC and I’m looking for fun ways to decorate on a budget!
Looks like you are in BC also……I found you over at Nesting Place. Looking forward to reading you blog. 🙂
I was just thinking a basic pom pom technique would work… awesome to know someone tried it!
Faux Juju Hat August 24, 2011 12:06AM
[…] Flutter Flutter JuJu Hat Tutorial […]
where did you purchase this yarn? ive looked everywhere and online and can not find any that thick
I purchased it from Michaels, but only the store near me seems to carry it. I’ve looked around to other Michaels, including online, and have not found it anywhere. Possibly they are testing the demand at my store? If you would like me to ship some to you just let me know!
is it called thick and thin? i found some on etsy, but havent found the color i want. id like a white or cream with brown flecks, do they have that at your micheal’s?
My Inspiration this Week October 28, 2011 10:12AM
[…] JuJu Hat tutorial via flutter flutter […]
How creative you are! I, too, have had trouble finding yarn chunky enough to make this, but will try Michael’s here today. I was also wondering what one would look like made from strips of plush fleece, or even wool felt. IF I could get the strips to twist or curl up on themselves a bit, it may look cool. (Think dread-locks!) Thanks for the tute! I pinned it on Pinterest.
Hi
Love the Juju hat, having trouble finding inexpensive wool?
How much wool did you use, what size skeins and thickness? Any help is greatly appreciated as I may need to order on line , it would help if I knew how much I needed…. Thank-you!
Rachel
My Television Debut! | flutterflutter.ca November 29, 2011 6:20AM
[…] FlutterFlutter will be making a virtual appearance on Home with Lisa Quinn next month! My blog, and Juju Hat Tutorial, will be part of an episode airing on December 22nd on the ABC Live Well Network. Here in Vancouver […]
Hey Rosa!
I just finished making my first JuJu Hat — it turned out great! I made it for a Christmas gift for my daughter. I know she’ll love it. Thanks for the simple tutorial. I’ll be making more for sure!
Hi Rosa,
I tried my first one with quick and cozy yarn… I am finding this yarn too “floppy” and light weight so will try to find the thick and thin somewhere! Thanks for the great idea!
Excellent tutorial! Thanks for a great idea!
Great tutorial. My juju is not so great, but I love it:) Thank you!
My JuJu Hat « PatchScrap February 1, 2012 7:49PM
[…] to Rosa for the JuJu tutorial and happy that I discovered a nice crafts shop […]
Cameroonian Juju Hats – Ecologique Design February 6, 2012 2:31PM
[…] can purchase one these hats for around $450, or you can always try to make one yourself out of yarn for around $10. Yarn Juju Hat Tutorial Share this:TwitterLike this:LikeBe the first to like this […]
am so going to make this!
thank you
African Juju Hats in Home Decor - What's Your Opinion? | * View Along the Way * July 11, 2012 3:35AM
[…] texture they add? (If so, pick up yours for just $650 Real American Dollars or – follow this pretty genius tutorial to make your own yarn version.)Or do you believe the juju hat will follow in the way of the […]
Happy Friday! | flutterflutter.ca July 20, 2012 6:46AM
[…] is how the back of my juju hat design looks now. It has changed since I first created the tutorial. I love the subtle little face hidden away on the back! For those of you that ordered one this […]
CCSRloves: Juju!!! …Who??? | CCSRinteriordesign August 23, 2012 1:54PM
[…] via […]
I just have to say that this tutorial is Genius! so many people link to it – and it’s just so cleaver! (and talk about cost effective!!!) thanks for this great post – still so relevant a year and a half later!)
Thanks for the sweet comment Christa! I had a lot of fun playing around to create the tutorial… and I’ve refined it even more since then! I’m selling them on Etsy now, making them with high end wool. It’s a fun little side project. 🙂
“DIY Project: JuJu Hat Tutorial | FLUTTER FLUTTER”
was indeed a perfect post. If it had even more photographs it would likely be possibly even far better.
Thank u ,Kayleigh
DIY Faux Juju Hat | RestlessOasis February 13, 2013 4:39AM
[…] the Camaroonian juju hat here? Well, I finally finished my DIY version via Rosa’s tutorial here. It took me longer than expected because I did not order enough yarn….and then I took a […]
Feather Wall Art DIY African Juju Hat Tutorial… | FFBlogs February 21, 2013 7:55PM
[…] so check hers out for an alternate take on it. 2. A juju hat made from thick wool yarn from Flutter Flutter if you’re against using […]
Making Juju Hats | FLUTTER FLUTTER March 4, 2013 6:54AM
[…] If you’re new here, and are interested in making one for yourself, you can check out the Faux Juju Hat Tutorial I posted way back when. I’ve refined the process a lot over the years, so they are a lot less […]
Brujería, brujería | The JuJu Hat May 28, 2013 9:05AM
[…] a que el precio no es admisible para todos los bolsillos os dejo un tutorial, aunque no se usan plumas queda muy bonito, para todos aquellos que os animéis a los DIY y os […]
Bringing out the JuJu how to | Make Do Home September 16, 2013 7:20AM
[…] a girl to do? Make a wool version! I found this how to on FlutterFlutter with an easy to make guide. I jumped to Spotlight in Wairau Park, selected some wool […]
Feather Wall Art DIY African Juju Hat Tutorial | Love Maegan October 11, 2013 3:02AM
[…] so check hers out for an alternate take on it. 2. A juju hat made from thick wool yarn from Flutter Flutter if you’re against using […]
Happy Weekend June 29, 2014 6:34PM
[…] Ashley did an amazing job with this DIY. I may need to copy her once I am stateside. – Here is another DIY I found via Natalie that I can’t wait to […]
Bamiléké Headdresses {Juju Hats} | A Girl & Her Pearl October 23, 2014 12:37PM
[…] that goes into hand stitching each feather to a raffia base. I’ve found a few tutorials, like this one, and this one, and am considering trying my hand at making my own Juju hat out of feathers or […]
Juju Hats Ruffling Feathers — Again! | messy by design November 16, 2016 2:26AM
[…] and Inside Out, to name a few” exist on The Nester site, but a hack of the hack did too via Flutter Flutter and her Juju Hat Tutorial! It’s a cheaper version of how to hack this African headdress with yarn and a paper plate […]