I like projects that are simple and easy to prepare. In my opinion, the set up should not take all day if the enjoyment only lasts ten minutes. This is the easiest volcano you can make, believe me! And kids of all ages like to see things explode! All you need are the following:
WHAT YOU WILL NEED:
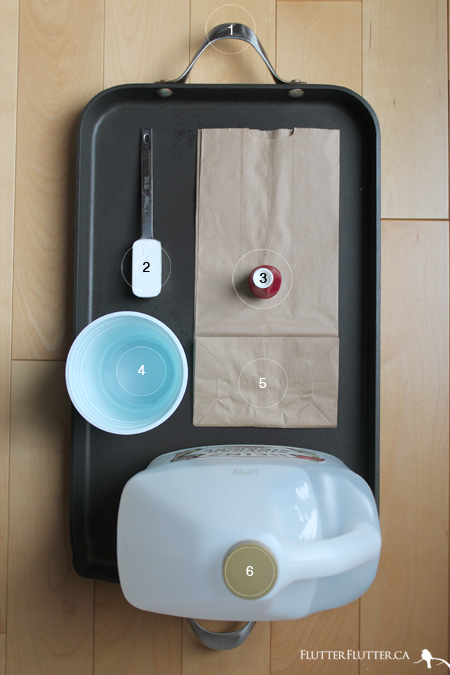
1. A tray, or dish, that is large enough to catch all the “lava” that will come out! 2. 1 tablespoon baking soda 3. Red food coloring 4. A can, or plastic cup 5. Paper bag 6. Vinegar
DIRECTIONS:
1. Cut halfway up all four sides of the paper bag.
2. Put the paper bag upside down over top of the can or cup.
3. Tear a hole in the top of the bag, above the opening to the cup.
4. Push back the torn edges and tape to the inside of the opening.
5. Fill the cup 3/4 full of the vinegar.
6. Add in a couple drops of food coloring.
7. Have the kids decorate the tray for full effect.
8. Finally, add in the baking soda and watch it go! You can add more baking soda and vinegar to keep the “lava”, and the fun, flowing.
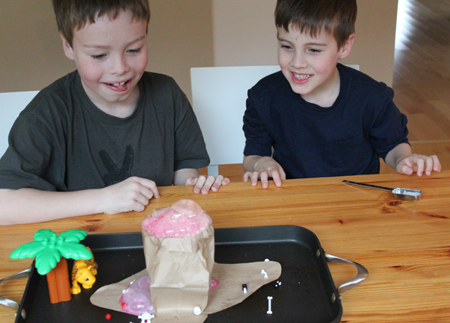
As you can tell from the smiles this activity was a hit! (My oldest is fishing out the Lego Ninjago skeletons that he’d thrown into the volcano as it was exploding… yes, boys will be boys!) I’d definitely do it again!
I hope the Spring Break DIY’s this week help to make any rainy days a lot more fun! I know I’m having fun making them. And there are more to come…!


18 comments :
Oh, your son is so cute Rosa! What a fun project. Believe it or not, I’ve never made a volcano before. Your’s and your son’s looks so cool.
Amy, I had never made one before either! It was pretty fun! 🙂
Great idea Rosa. We might be doing this today.
You really should! It’s a blast! (no pun intended 😉 LOL
Okay Rosa, you’ve gotta write a book now. Just think, you can do the graphic design, photographs and writing! You are such a talented girl!
Haha! I can’t imagine adding “write a book” to my to-do list! But, I guess it’s not that much different than blogging, is it.
I agree with Tracey!!
What fun for your kiddies… and the photos are perfect!
Victoria
Thanks Victoria! I love how blogging has been such a great outlet to work on learning photography. Blogging is a great motivator, don’t you think?!
Looks like fun times are being had at your home! What a fun idea. I feel like doing this myself, by myself, right now. 😉
I know, right Janis! It is really fun!! 🙂
Oh I agree with Tracey…you need to write a book…with those boys as models you won’t need to worry about the content (even tho I know you will have amazing content!)I could look @ their sweet smiles all day long!
I love the fun mischievous looks on their faces…and the lego inside…classic boys stuff!
p.s. the best blog on the bloc..i think is a web site that turns your blog into a book….for a keep sake for your boys this would be amazing …even if you just do the ones of them!…or just do one of those on line photo books….there you now have another activity!…sorry!
p.p.s. can’t wait to see other ideas you are going to post here…I have two grand nieces 4 & 3 coming in 2 weeks so this will be my go to for ideas!
Thanks for sharing!
I cannot wait until my son Behr is old enough to appreciate this!
Ohhhhhhh! My Emma would be so thrilled to make this! Thank you for sharing! 🙂
this is awesome! i’ve been wanting to make a volcano for my girl but so don’t have the time to paper maché a big one right now. we’ll be trying this out soon!
Thanks Andrea! You’re right, the paper maché volcano is such an huge time commitment! This is the perfect amount of prep for me! 😉
Spring Break DIY: Milk Art | FLUTTER FLUTTER November 7, 2012 1:13AM
[…] Tattoos / Eyebombing / Make a Volcano / Wire […]
Great tutorial! The step-by-step process was really clear! : )
So close we can taste it | The Big Riggs June 3, 2014 8:04PM
[…] for the garden 7. Go to a children’s (or any) museum 8. Make play dough 9. Bake cookies 10. Build a volcano 11. Go to the library 12. Make homemade Popsicles 13. Pick out a craft to make from the craft store […]